Upload trails
Open the trail editor
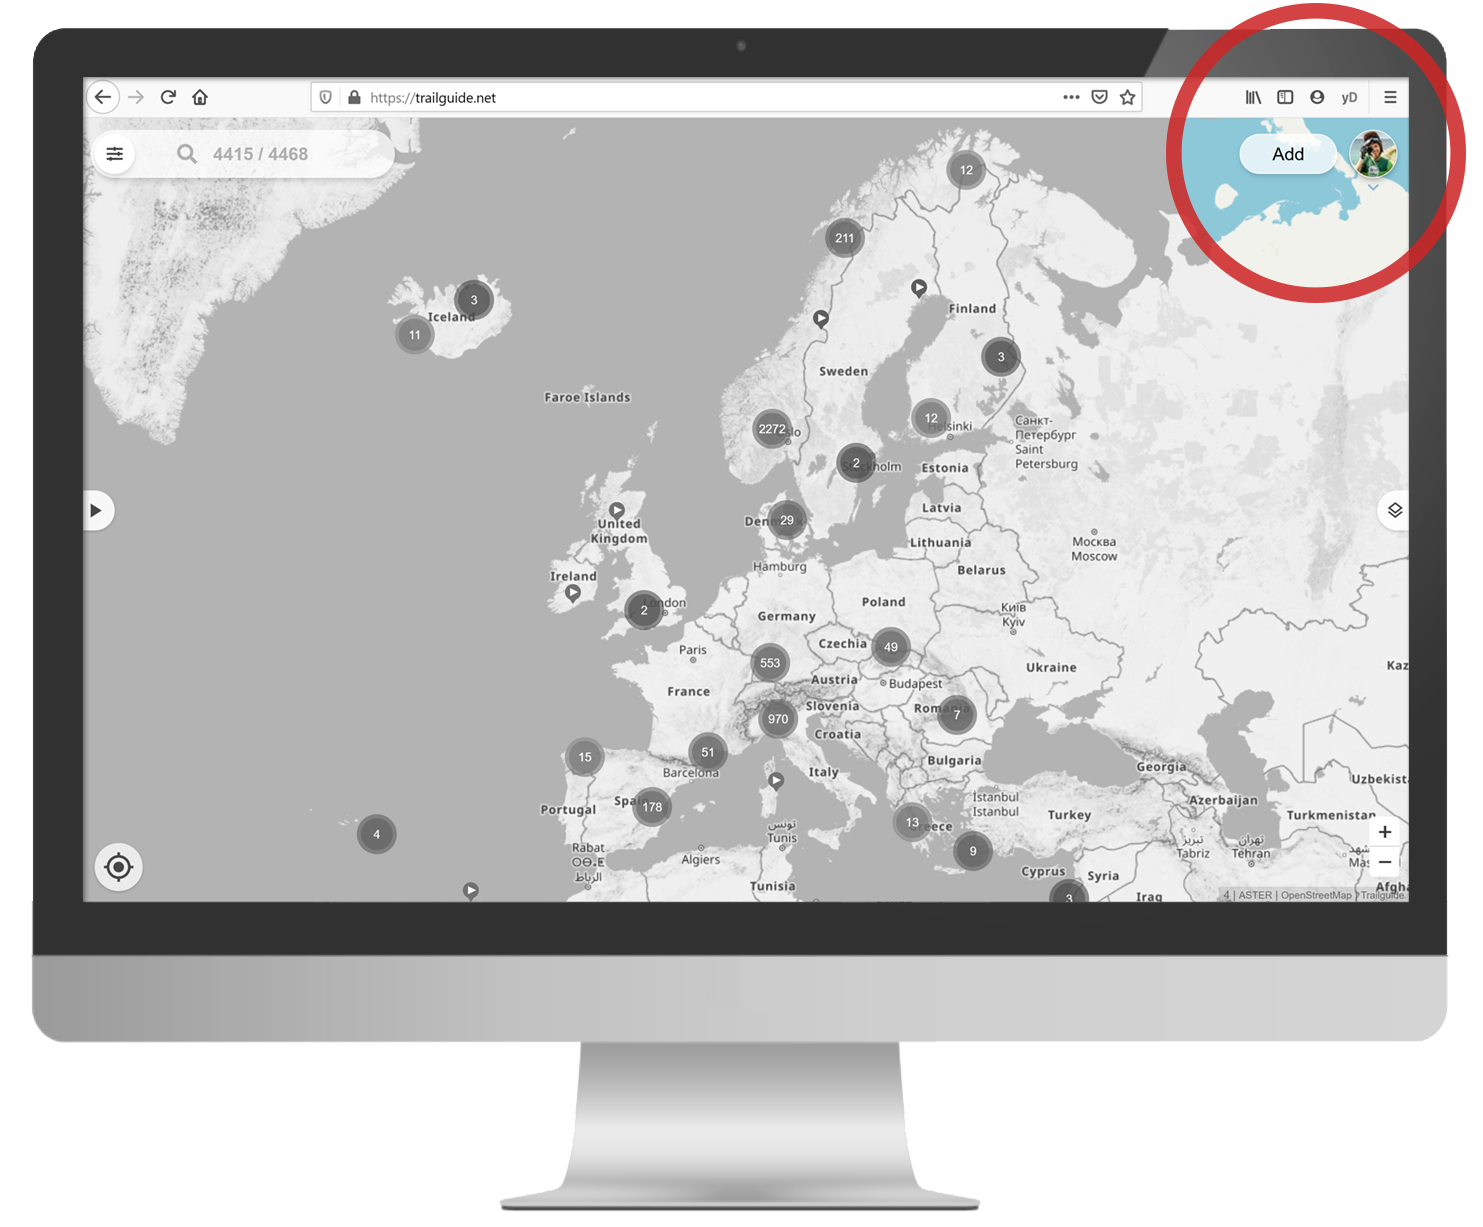
Open trailguide.net on your desktop computer and log in.
Click on the "Add" button next to your profile picture.
Import a GPX track
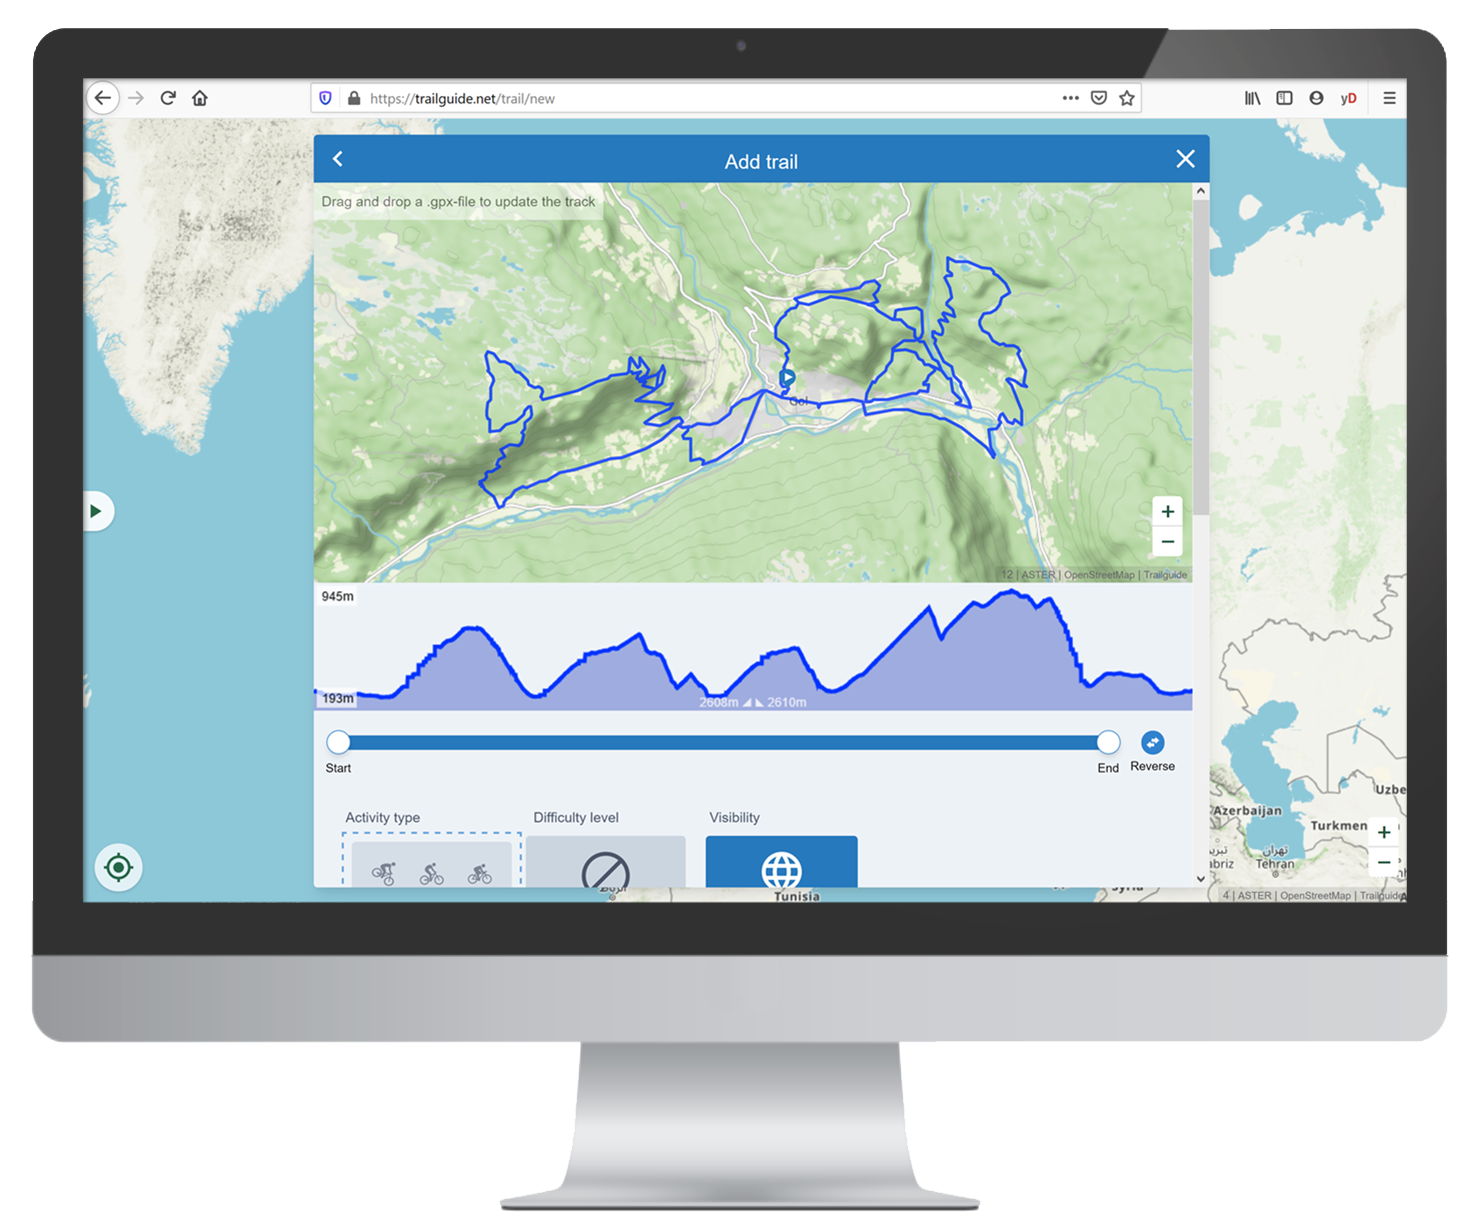
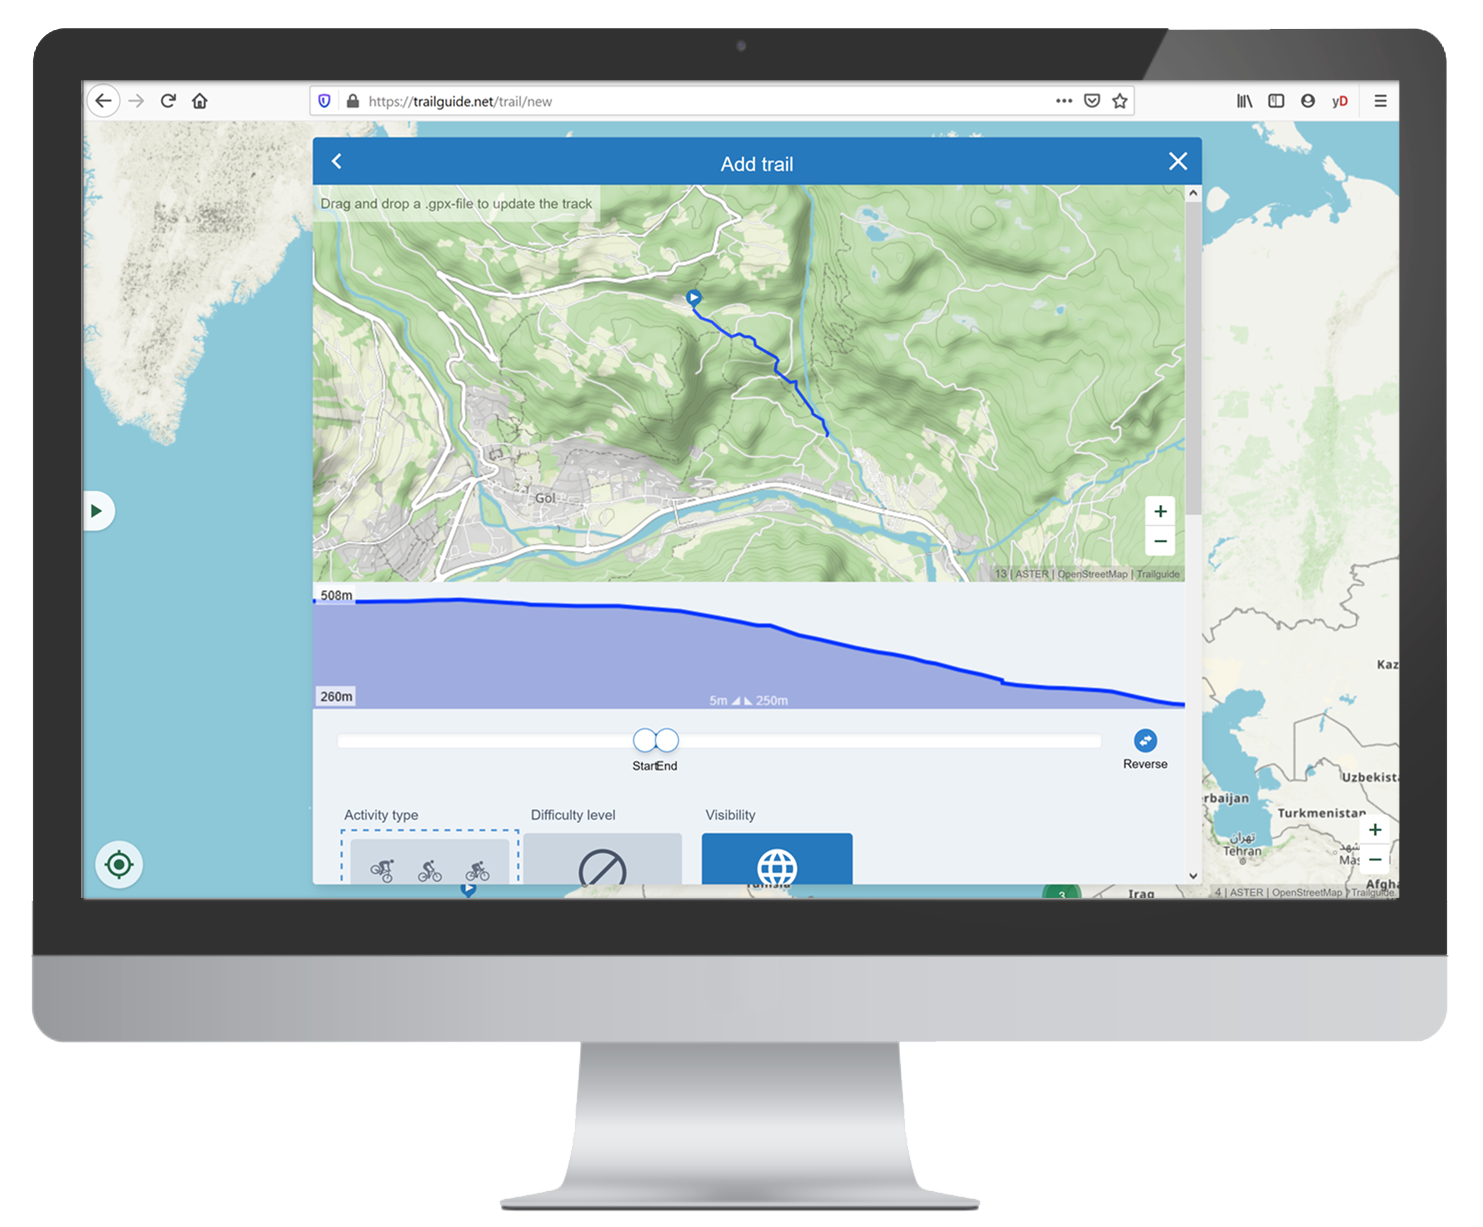
Drag and drop your GPX file into the map section of the map editor. When it is uploaded, you see the track and height profile in the trail editor.
GPX files (GPS Exchange Format) is a common standard to save and exchange locations and tracks. Most apps and devices use this standard.
There are many apps for recording and exporting GPX tracks. Strava is used by many. On their website you can export the recorded GPX track and save it to your computer.
Edit the track
Use the slider below the map to cut the start and end point of the track.
If the track is more appropriately mapped in reverse order, you can do so by clicking the "Reverse" icon to the right of the slider.
Edit the track appropriately to the selected activity type.
When you upload to the "MTB singletrack" category cut away the parts on paved or gravel roads.
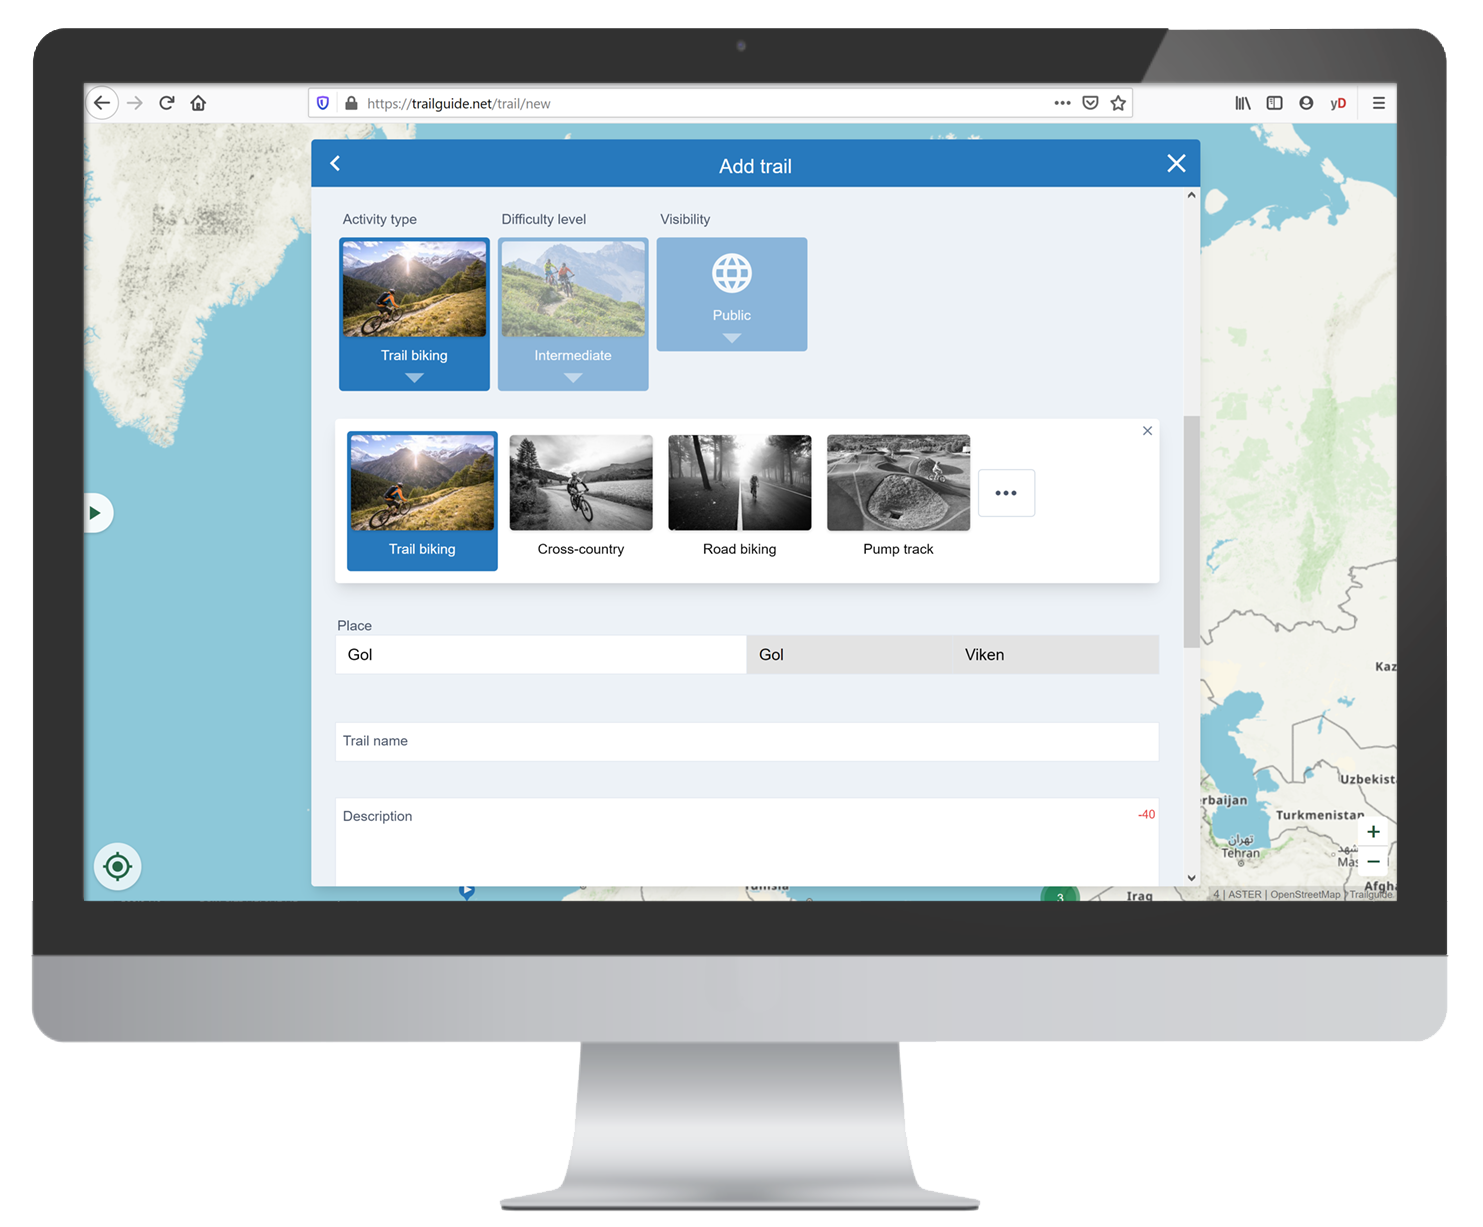
Select an activity type
Click on the "Activity type" dropdown and select the one you want.
Make sure to select the right type to keep the quality of content high and the app useful for all users!
See more about the different activity types here.
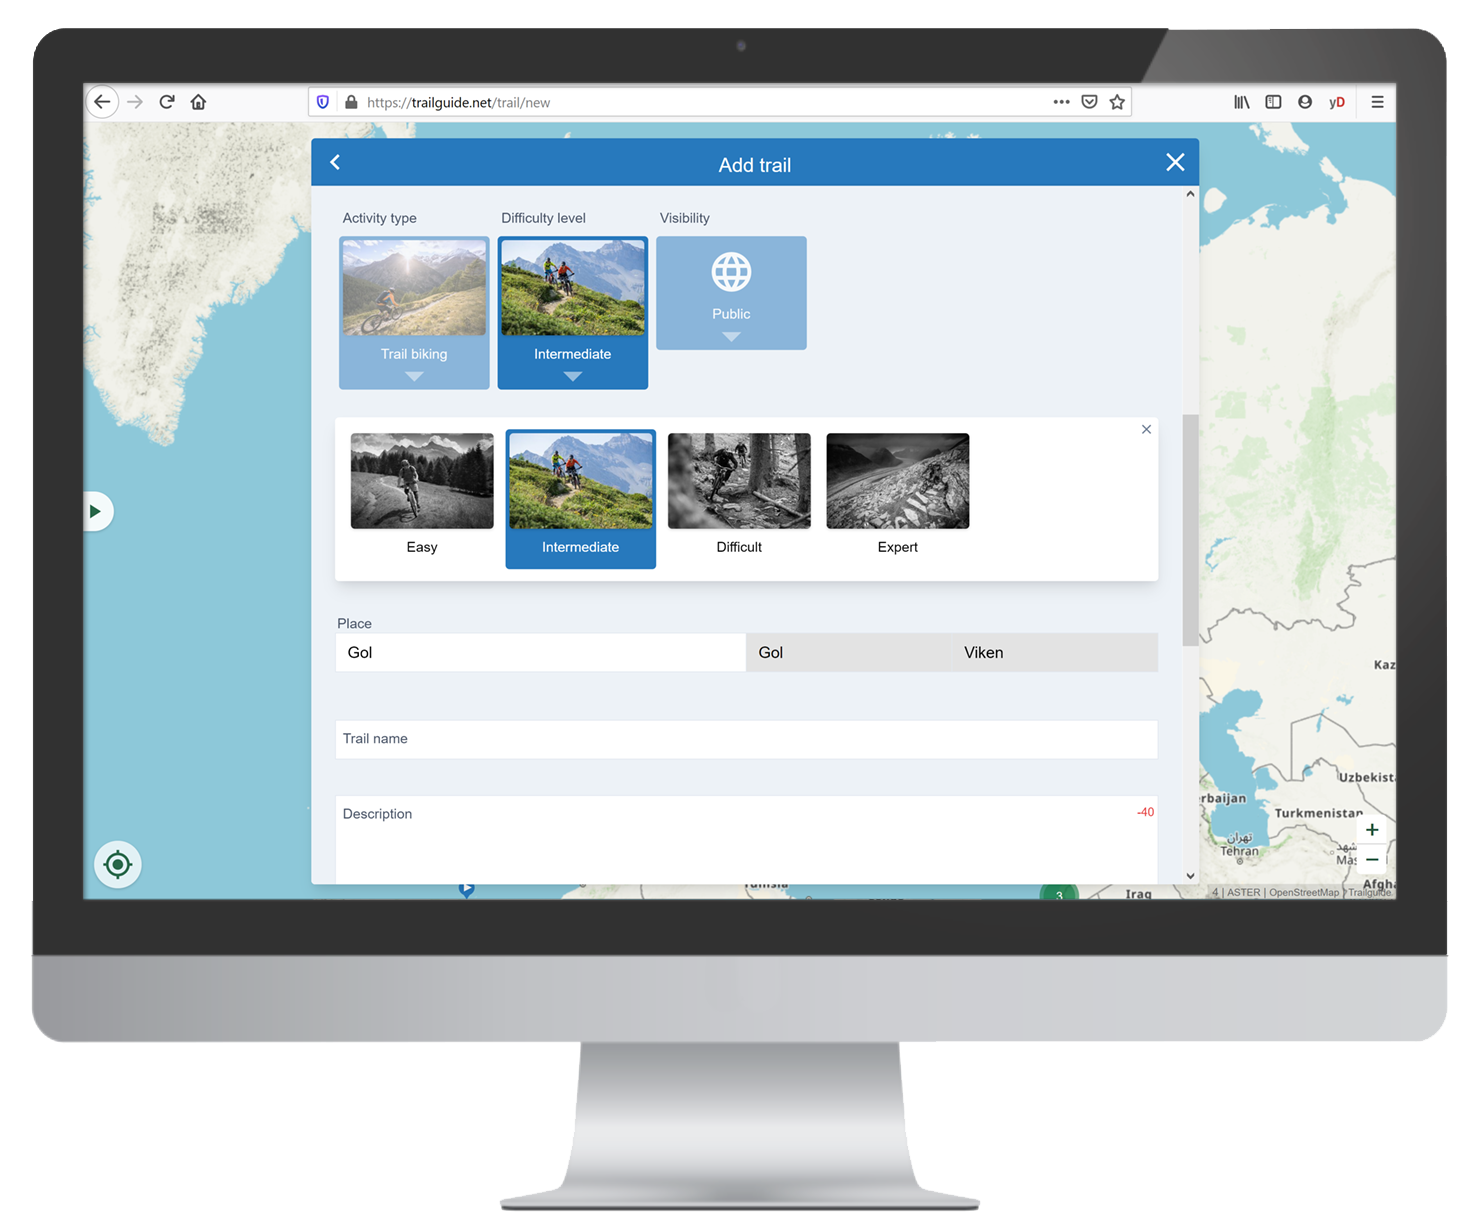
Select a difficulty
Click on the "Difficulty level" dropdown and select the one that fits best.
This is the technical difficulty of the activity! You should not not consider any physical demands here. This is visible from the length, elevation, technical difficulty, and additional information in the description!
Read more about the difficulty rating systems.
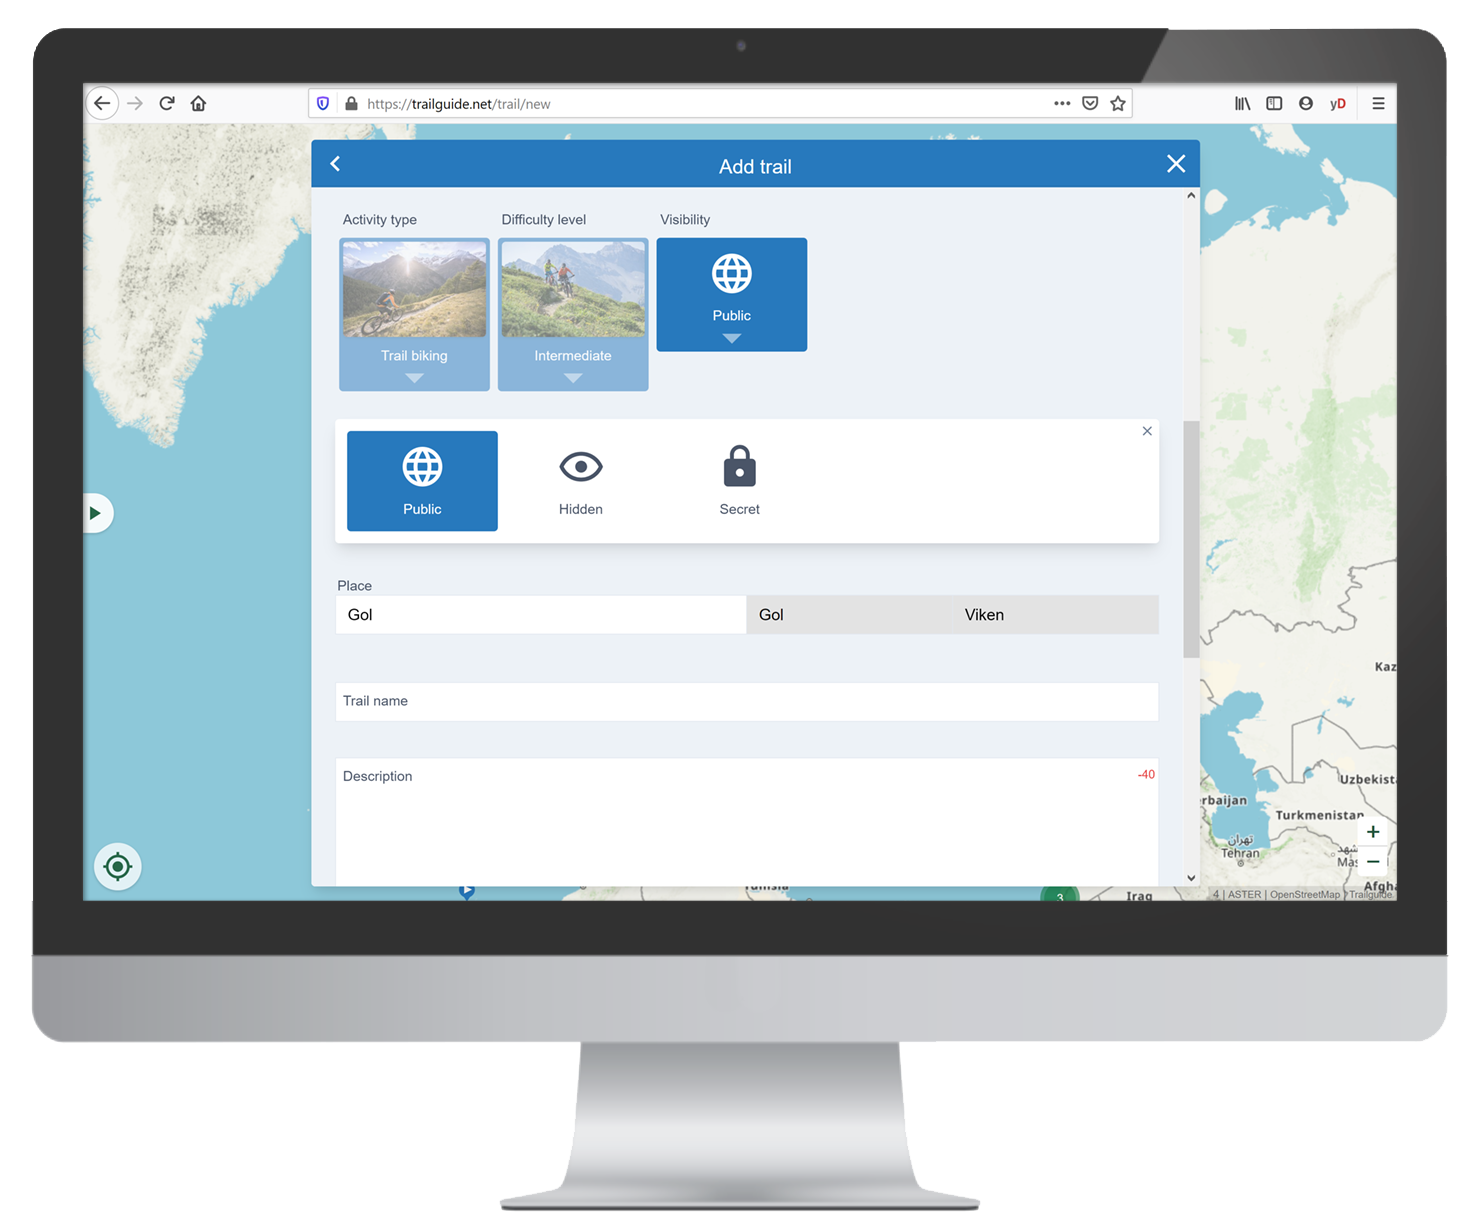
Select the visibility
Click on the "Visibility" dropdown and choose an option.
Public shows the track to every user on the public map and in the list. It appears in the search.
Hidden hides the track from the public map and in the list. It does not appear in the search, but you can share the URL of the track. Everyone who has the URL can access the activity page and show the track on the main map. You find hidden tracks in My page.
Secret hides the track from everyone but you. You find hidden tracks in My page.
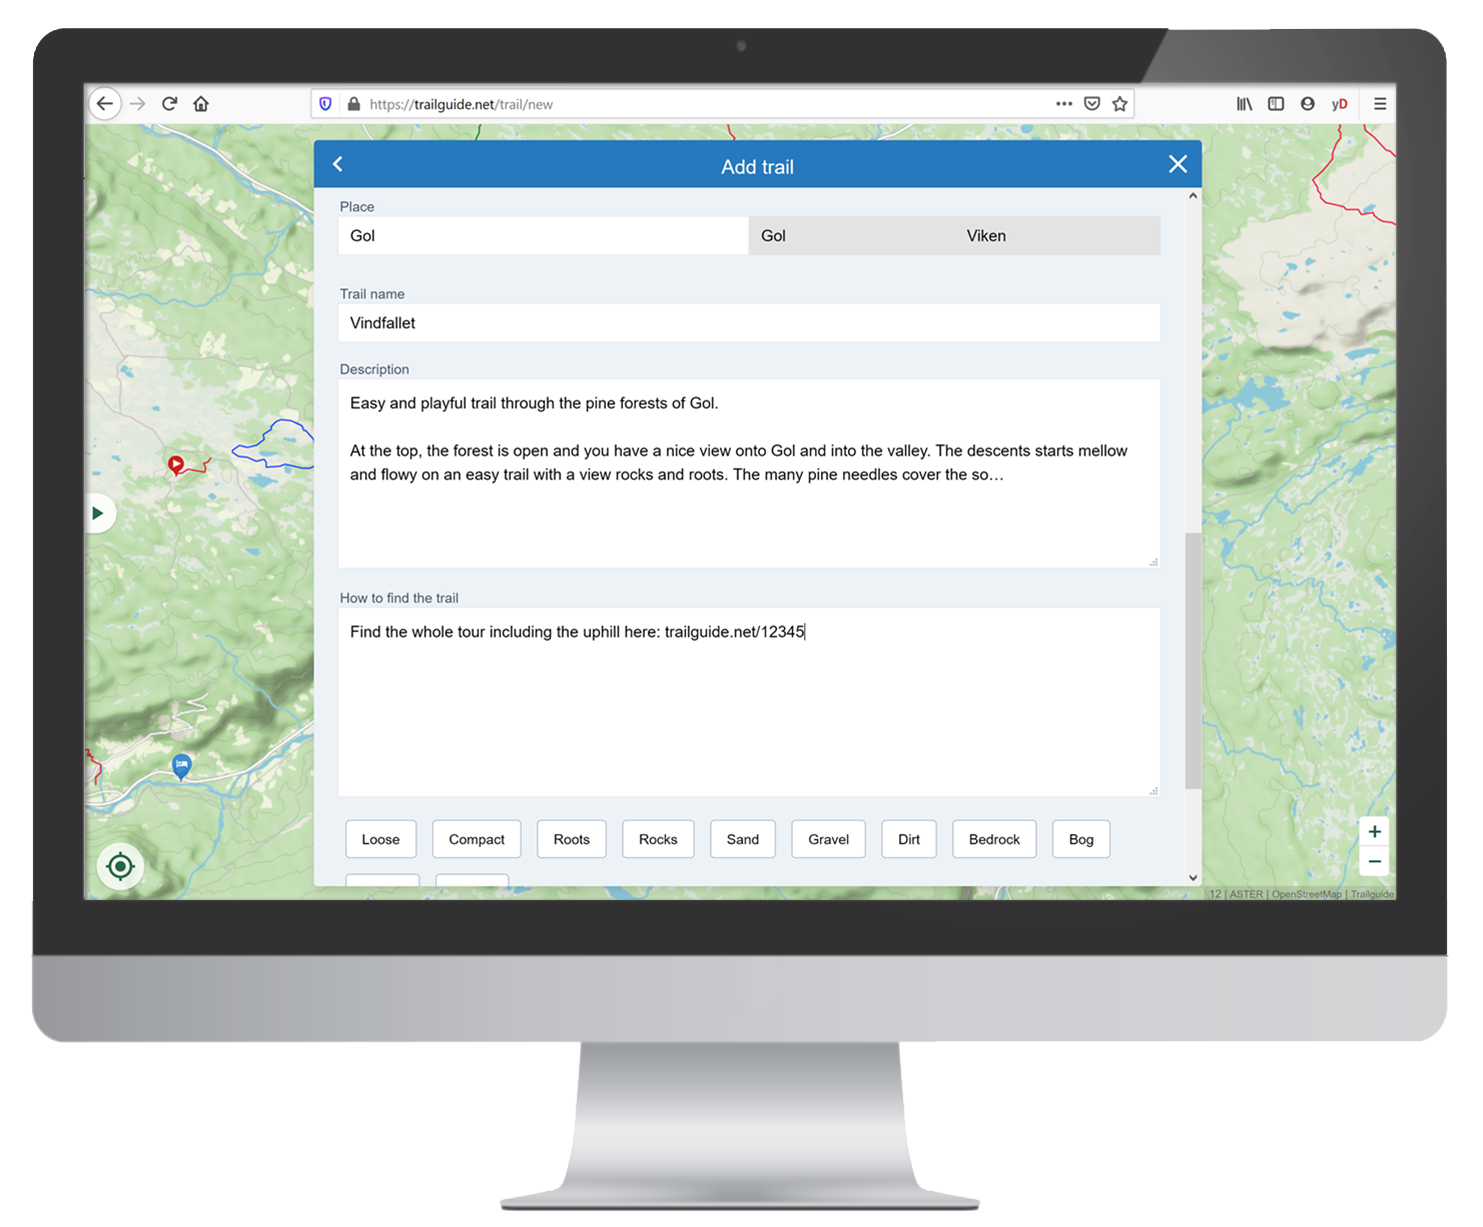
Add a description
The location of the activity is generated automatically from the information of the GPX track file.
Give the activity a characteristic and significant name. Keep it short and succinct.
We recommend starting with a description of the character of the activity or the experience in one comprehensive sentence. For example "Easy natural trail with a stunning view into the Great Valley."
Then a more detailed description, but still compact and limited to important information. Describe the charactar and what makes this track unique.
Do not describe the routing instructions (turn left here, 100m straight, then right, etc...). This is what the GPS track is for.
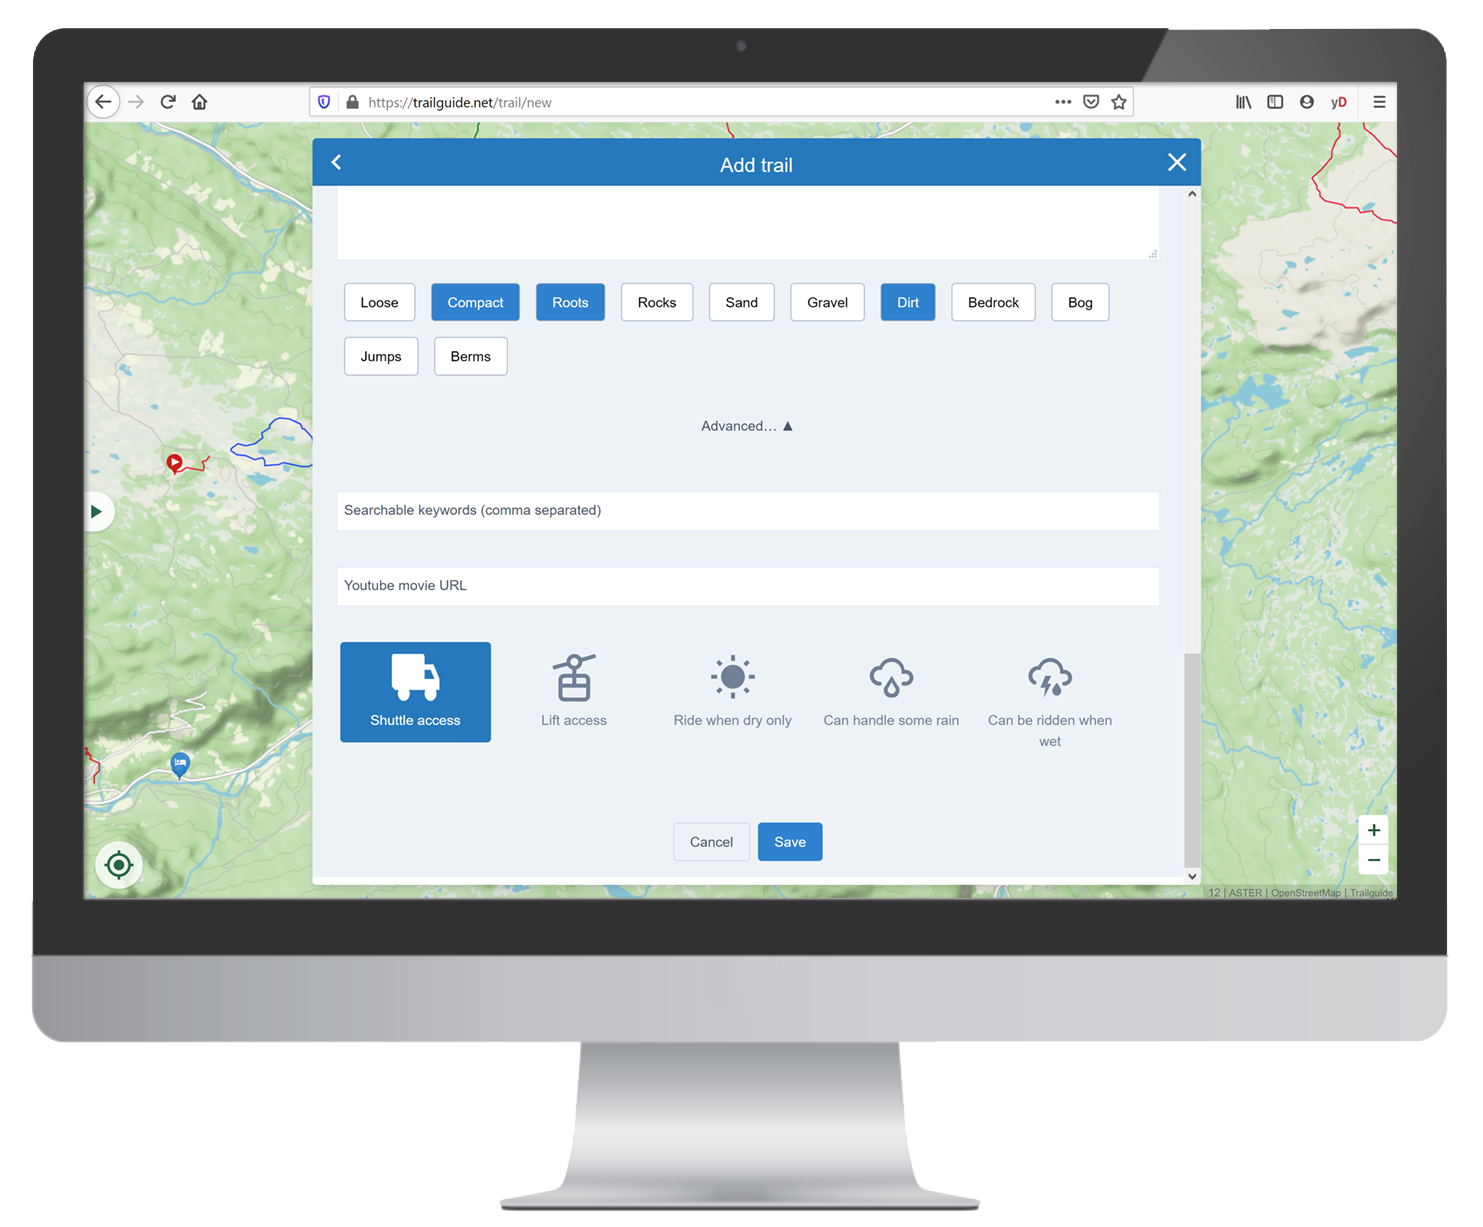
Advanced options
Click to select attribute labels of the trail.
Open more options by clicking on the "Advanced" dropdown.
Enter keywords separated by comma. They are not visible in the activity page, but are searchable.
Add a video by adding URL to a Youtube video.
Select possible ways of access or how well the trail can take rain.
Click on "Save" when you are finished.